There ain’t no party like a Scranton party, cause a Scranton party don’t stop!

After 9 seasons of ruling the air, The Office, premiered it’s last episode a few days ago.  This Emmy nominated show has been at the top of the charts for the majority of its time.  The querky comedy show has found the hearts of millions around the world making the goodbye so difficult.  The Office has been the only show i have ever followed religiously, so the series finale was a very bitter sweet moment for me.  This show has made me proud to say “I’m from Northeastern Pennsylvania”.  People know where Scranton is because of this show.  It has put us on the map.


As many of you may know, there was an Office party held in Scranton the week before their finale aired.  The cast arrived in NEPA in style.  They went to the local bars, and they toured the city that molded thier acting carrers.  Scranton welcomed them with open arms; lining the streets of down town for the parade procession.  Then, continued the party onto the brand new PNC field for questions and answers.  This was a memorable moment for many people who have been following the show over the years.


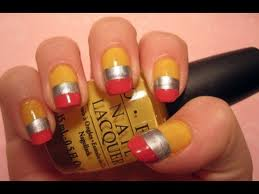
So, in commemoration with the show I have decided to do nails based on an item extremely well known in the workplace: a pencil.  This easy design requires very minimal effort but will definately be eye catching.


  1. Start by painting your entire nail a yellow of your choice.
  2. Let that dry completely.
  3. Then, paint a coat of pink on the top half of your nail.  Let that dry.
  4. Finally, use a metallic silver polish, and swipe it across the middle of your nail.
  5. Let everything set and put a top coat over top and then you’re finished!


pencil nails

Play Ball!

It’s my favorite time of year.  The flowers are blooming, the days are getting longer and the weather is getting warmer.  Spring is my favorite season for those reasons but also because it’s the beggining of baseball season!  America’s favorite past time is the official sign that summer is on it’s way.  Even though the weather might not be favorable, from snow, to torential down pour and dust storms, the players never fail when it comes to putting on a good show. 

One of my goals in life is to make it to every ball park in the MLB.  Every stadium is so different and has a different atmosphere that veries from place to place.  I love learning about all the different stadiums, and all of the special features each one has to offer.

The nails this week are pretty simple.  It only takes a few steps but doesn’t lack creativity.  (Sorry if the directions are a little difficult to follow.  It is a little difficult to describe)

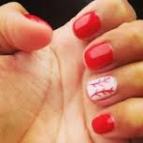
  1. Paint all of your nails red with the exception of your ring finger (the one next to your pinky).
  2. Paint your ring finger white
  3. Use a small detail brush and dip it in red polish
  4. Carefully stripe two lines down your nail, almost parallel from eachother
  5. Then, paint small V’s on the lines you have already created
  6. Let all of your nails dry and apply a top coat!

Enjoy!


Image

Minnie Mouse Nails!

Hello, everyone!  As some of you may know, I just returned home from a vacation in Disney World!  It was an extremely enjoyable week away from the insanity of school and everyday life.  The weather wasnt very coopearative, with highs of 50 degrees, and wind gusts of up to 30 miles per hour, but I can’t comaplain!  It was better than the snow you all recieved while I was gone!

Disney is probably my favorite place to visit.  Everything about the park makes your experience worth while.  All of the employees have a smile on their and look like they enjoy what they are doing.  Their smiles and friendlyness is contagious so everyone in the park seems to carry to the people visting that parks.  Here I have linked some very interesting facts all about Disney.

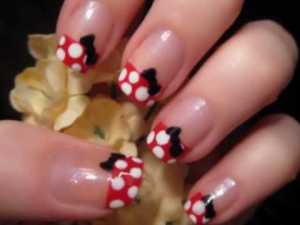
My nails are based on my favorite character: Minnie Mouse 🙂 Minnie Mouse has been my favorite character ever since I was a child.  From her bows, polka-dots and yellow shoes, you can’t help but love her!

Lets begin on the procedure:

  1. Paint a top coat on your plain nails to give your nails a beautiful shine.
  2. Once the top coat is dried, take a piece of tape and place it on your nail, so the tips of your nails are the only part exposed.
  3. Paint the tips of your nails red.
  4. Wait for them to dry, then take a Q-tip and cut the cotton part off.
  5. Dip the end of the Q-tip into white paint and place small white dots all over the red.
  6. Let that dry completely.
  7. To finish it off, take a thin brush and black paint, and carefully draw a bow on the left side of the red.
  8. Lastly, place a top coat over the design to seal it!

I hope you try this out and you like it!

minnie mouse nails

Newspaper Nails!

This week’s nail design is simple and easy, but will catch a lot of attention. Newspaper nails is a different tend that is sweeping the nation.  Within minutes, you will be able to master this design that will get you compliments left and right.


The newspaper article I used was about the cruise ship that malfunctioned off the coast of Alabama.  Here I have linked the CNN website with videos, pictures and articles about the disaster.  With all the malfunctions on cruis ships lately, I’m growing a fear of sailing on the ocean.  You never know when something might go wrong!


Now back to the nails.  Here is the procedure:

  1. Paint a white nail polish over each of your nails.
  2. Let that dry completely.
  3. Get a small conatiner of rubbing alcohol and a section of your newspaper.
  4. Soak your nail in the alcohol for a few seconds then place the newspaper over top.
  5. Press down on the newspaper and let it sit for a minute or two.
  6. Carefully peel the newspaper off, and you should be left with a transfer of the newspaper on your nails!

Pink-Out!

This weeks nail design is about everything pink.  Thursday night was our annual “Pink Out!” game for the Tunkhannock Girl’s basketball team.  Of course, we go all out in our clothes but also our nails.


The purpose of that game is to raise money for the Susan G. Komen foundation.  All proceeds raised are donated to help fight breast cancer. This year we were very successful in raising close to $750.

Every year O.P.I. releases new nail polishes to help raise awareness for breast cancer.  Linked here, is an example of last years special edition polishes.  Nail polish isn’t the only way to help raise awarness.  There are several ways to help fight it like through donations, participating in walks, or purchasing other merchandise.


The procedure to this simple, yet elegant design is as follows:

  1. Prepare all of your nails with a base coat to protect your natural nail
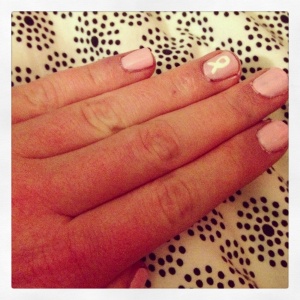
  2. Take any pink color of your choosing (preferably a light, baby pink), and apply it to all of your nails.
  3. Then on your ring finger, use a white nail polish to create the cancer ribbon bow.
  4. Finally, apply a top coat to protect your design.


Pink Out


Hello Word Press!

Welcome to my blog!  On here I will be trying out new nail designs every week and displaying them for all of yout to see!  (Sorry boys.  This most likely won’t interest you)  The reason for choosing this topic starts with a horrible habit of mine– biting my nails.  It’s a habit I have been trying to break for years.  They say nail biting is one of the wort things you can do to yourself.  Leading to sickness and damaged teeth.  I believe that if I have a nice design on there every week, I will slowly break the habit, and eventually break the habit all together!


Now enough about biting nails.  Let’s get to the good stuff!


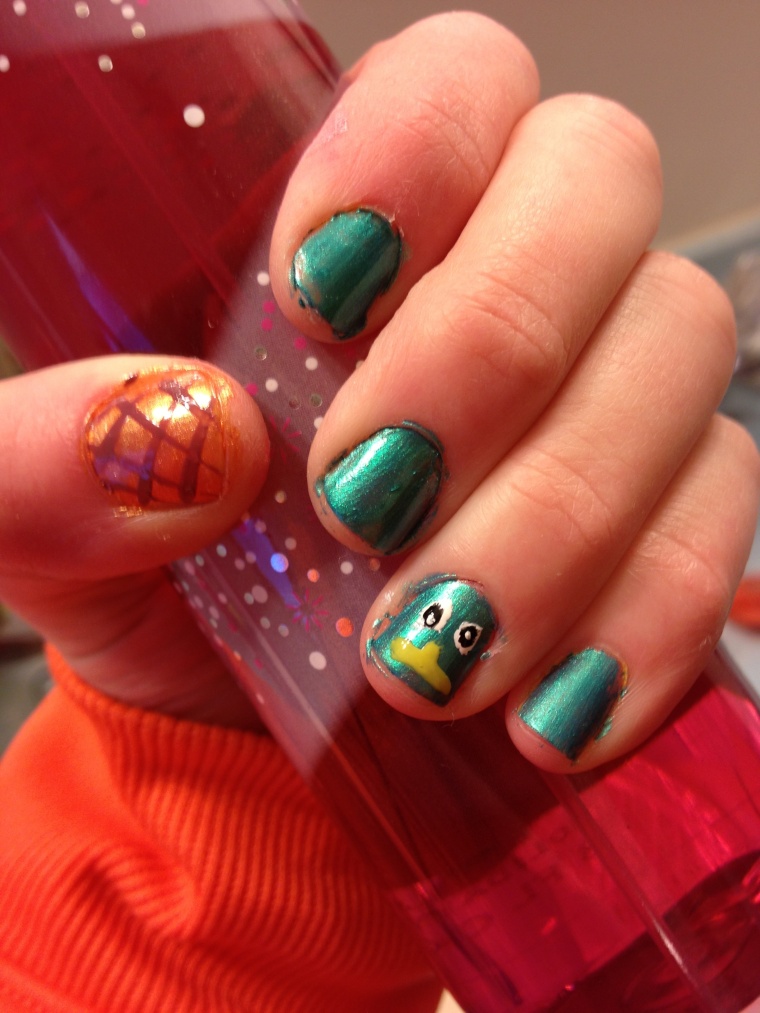
My first design is inspired by the hit T.V. show Phineas and Ferb

My favorite character in the show is Perry the Platypus.  If you are unfamiliar with the show, Perry is the pet of Phineas and his step brother, Ferb.  The family is unaware that Perry is also a secret agent, who stops the evil Doctor Doofenshmirtz from preforming outrageous plots to destroy the town.


Here is the procedure I followed to accomplish this look:

  1. I painted my thumb nail a thin coat of orange.  I let that dry, then lined  a light brown  polish across my nail to get the affect of Perry’s tail.
  2. Then I proceeded to color my remaining nails a dark turquoise.
  3. On my ring finger, I placed two white dots to represent his eyes.
  4. While the white dryed, I took a yellow polish and made his beak.
  5. When the white was finished drying, I placed two black dots over top, to represent pupils, then another white dot on top of that to show a little glimmer in his eyes.
  6. I let the paint set and dry then put a base coat on top!

Enjoy! (The picture should be in a seperate post above or below :D)